_1589955301543.JPG)
-4a7356dd8d51430b96fa3e058870195a.JPG)
1. 引入依赖
使用 WebSocket 首先得引入对应的依赖,在 pom.xml 中添加以下。
       <!--websocket的专用依赖-->
       <dependency>
            <groupId>org.springframework.boot</groupId>
            <artifactId>spring-boot-starter-websocket</artifactId>
        </dependency>

        <!--用于mvc-->
        <dependency>
            <groupId>org.springframework.boot</groupId>
            <artifactId>spring-boot-starter-freemarker</artifactId>
        </dependency>
2.编写配置类
注意:使用 Spring Boot 的内置容器需要注入以下的 bean,使用独立的 servlet 容器则不用!直接交由容器管理即可
@EnableWebSocket   //开启websocket
@Configuration
public class WebSocketConfig
{
    @Bean
    public ServerEndpointExporter serverEndpointExporter()
    {
        return new ServerEndpointExporter();
    }
}
3.编写服务类
- 该类使用注解 @ServerEndpoint 注解为一个服务端点,并且指明路径。
- 使用注解 @Component 注解为一个 bean,交由 IOC 容器管理。
- 在类中使用注解 @OnOpen、@OnClose、@OnMessage 等标注方法。
- @OnOpen:该方法主要是用于处理一个新打开的连接。
- @OnClose:用于标注处理关闭连接的逻辑。
- @OnMessage:用于处理客户端发送的信息等,推送信息至客户端。
- ......剩余若干注解不说明。
import lombok.extern.slf4j.Slf4j;
import org.springframework.stereotype.Component;

import javax.websocket.OnClose;
import javax.websocket.OnMessage;
import javax.websocket.OnOpen;
import javax.websocket.Session;
import javax.websocket.server.PathParam;
import javax.websocket.server.ServerEndpoint;
import java.io.IOException;
import java.util.Map;
import java.util.concurrent.ConcurrentHashMap;
import java.util.concurrent.atomic.AtomicInteger;

/**
 * @Author clay
 * @Email wandererchen.xyz@foxmail.com
 * @Blog www.wandererchen.xyz
 * @Date 2020/7/14 22:58
 * @Version 1.0
 */
@ServerEndpoint("/webSocket/{userId}")
@Component   //交由容器管理
@Slf4j
public class WebSocketServer
{
    //使用原子类记录在线用户数
    private static AtomicInteger onLine=new AtomicInteger(0);

    private static volatile Map<String,Session>sessionMap=new ConcurrentHashMap<>();

    @OnOpen
    public void open(Session session, @PathParam("userId")String userId) throws IOException
    {
        onLine.incrementAndGet();
        sessionMap.put(session.getId(),session);
        session.getUserProperties().put("userName",userId);
        log.info("新增上线ID:{},当前线上人数:{}",userId,onLine.intValue());
        for (Session item:sessionMap.values())
        {
            sendMessage(item,"欢迎 ID:"+userId+"进入聊天室!");
        }
    }

    @OnClose
    public void onClose(Session session) throws IOException {
        onLine.decrementAndGet();
        sessionMap.remove(session.getId());
        log.info("新增下线ID:{},当前在线人数:{}",session.getUserProperties().get("userName").toString(),onLine.intValue());
        for (Session item:sessionMap.values())
        {
            sendMessage(item,"用户--"+session.getUserProperties().get("userName")+" 退出聊天室!");
        }
    }
    @OnMessage
    public void onMessage(String msg0,Session session) throws IOException
    {
        log.info("收到消息:{}",msg0);
        String msg = String.format("[%s]:%s", session.getUserProperties().get("userName"), msg0);
        session.getBasicRemote().sendText(msg+"\t[自己]");
        // 推送至他人
        for (Session item : sessionMap.values())
        {
            if (!item.getId().equals(session.getId()))
            {
                sendMessage(item, msg);
            }
        }

    }

    private void sendMessage(Session session,String msg) throws IOException
    {
        session.getBasicRemote().sendText(msg);//推送至用户
    }
}
4.页面以及js脚本
- 需要注意浏览器是否支持 WebSocket。
- 需要为WebSocket设置 onopen、onclose、onmessage等事件处理方法。
- 页面发送信息,通过调用websocket的send()发送。
<html>
<head>
    <title>WebSocketTest</title>
    <script src="${springMacroRequestContext.contextPath}/js/jquery-3.4.1.js"></script>


    <script>
        var ws=null;
        function webSocketInit() {
            let id=$("#userId").val();
            if (id.length===0)
            {
                return;
            }
            let url="ws://127.0.0.1:8090/webSocket/webSocket/"+id;
            if ("WebSocket" in window)
            {
                console.log("支持WebSocket!");
                ws=new WebSocket(url);
            }

            //设置事件处理
            ws.onopen=function ()
            {
                console.log("打开链接");
            };

            ws.onmessage=function (evt) {
                console.log("接收信息:"+evt.data);
                $("#info-area").append("\n\n"+evt.data);
            };

            ws.onclose=function () {
                console.log("WebSocket连接关闭!");
            }

        }

         //关闭函数无法触发,目前不明原因,可以通过浏览器控制台手动调用
        function close() {
            ws.close();

        }

        function send() {
            let msg=$("#info").val();
            clear();
            console.log("将发送的信息:"+msg);
            if(msg.length!==0)
            {
                ws.send(msg);
            }
        }
        function clear() {
            $("#info").val("");
        }


    </script>
</head>
<body>
<button onclick="webSocketInit()">点击连接</button>
<button onclick="close()">关闭连接</button>
<div align="center">
    <table border="3px">
        <tr>
            <td>个人ID:</td>
            <td><input type="text" id="userId"></td>
        </tr>
        <tr>
            <td>信息:</td>
            <td><textarea id="info-area" ></textarea> </td>
        </tr>
        <tr>
            <td>输入:</td>
            <td><input type="text" id="info" name="info"></td>
        </tr>
        <tr>
            <td><input type="button" id="bt-send" value="发送" onclick="send()"></td>
            <td><input type="button" value="点击清空" onclick="clear()"></td>
        </tr>
    </table>
</div>
</body>
</html>
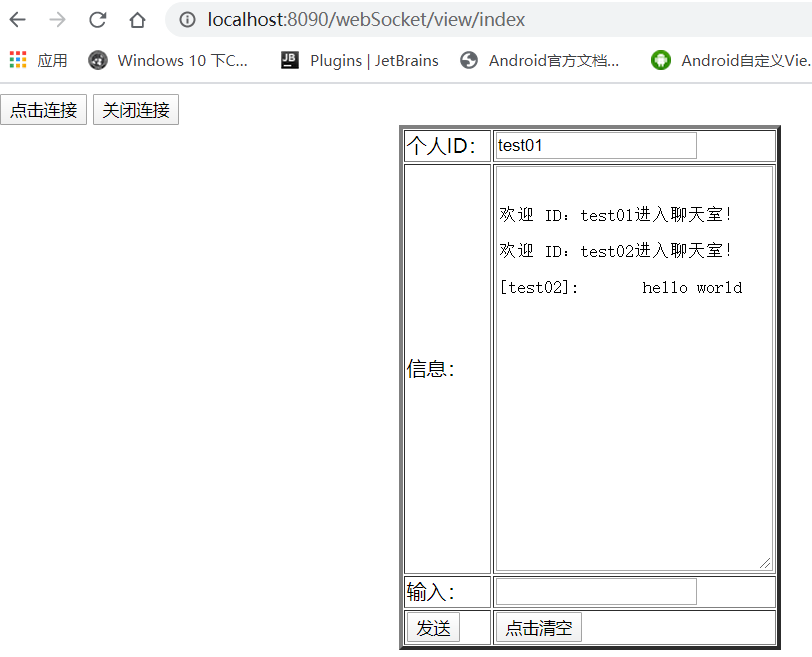
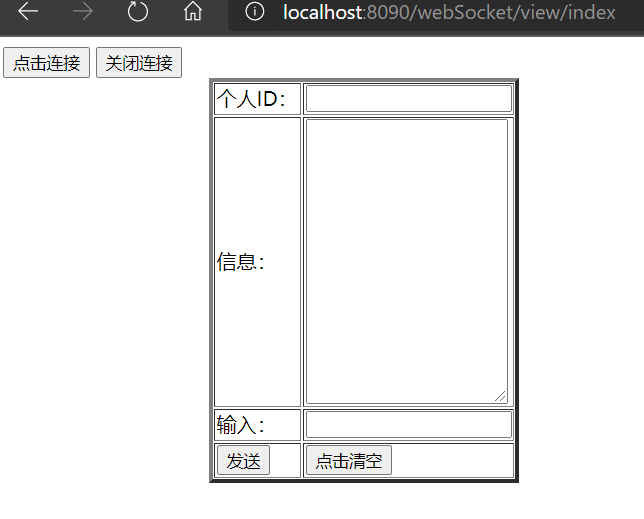
5.运行效果
- 打开浏览器,输入url:http://localhost:8090/view/index。页面如下:
- 在“个人ID”输入框内输入昵称,点击按钮“点击链接”。如下所示:
(浏览器----1)
(浏览器----2)
- 发送聊天信息: